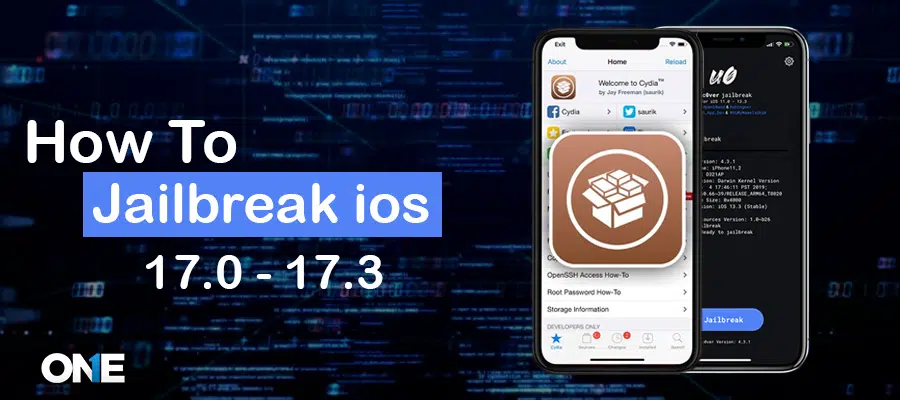
Are you seeking to enhance the functionality of your iOS devices by unlocking Apple’s default settings on the latest iOS 17? Jailbreaking can be the key to unlocking a new world of advanced features and gaining unprecedented control over your device. However, it’s crucial to understand the process of jailbreaking for iOS 17 to ensure a smooth and successful experience. Let’s explore the convenient methods to understand the process.
Safety Warnings
To unleash the full potential of your iOS device, explore and try the genuine techniques to jailbreak iOS 17.0 to iOS 17.3. Before commencing the process, please meticulously review the safety warnings carefully to understand the grasp the potential risks associated with the procedure comprehensively, ensuring you are fully aware and responsible.
Jailbreaking Your iOS Device Comes With Several Risks:
- Warranty Void: Jailbreaking can void your device’s warranty and result in Apple refusing service for hardware issues.
- Security Threats: As Apple’s security layers are bypassed, your device becomes more vulnerable to malware and security threats.
- App Compatibility: Some apps and services may not work correctly on a jailbroken device.
- Device Instability: Jailbreaking may cause your device to crash or become unstable.
- Potential Bricking: Incorrect jailbreaking can lead to a severe consequence-rendering your device being unusable, a condition known as ‘bricking ‘.
Please consider these implications carefully before proceeding. It’s important to be responsible and fully understand the risks involved. For a comprehensive safety guide, click here.
Types of Jailbreak:
- Rootless
- RootFull
Rootless:
In the Rootless method, the jailbreak will be removed after the device reboots. While this may seem like a hassle, it’s a straightforward process to re-jailbreak your device.
Rootfull:
In the Rootfull method, your device will remain jailbroken even after a reboot, providing you with a seamless and uninterrupted experience.
Method # 1 Jailbreak iOS 17 with WinRa1n on Windows (Rootless)
WinRa1n is a jailbreaking process for iOS 17 on the Windows operating system. To jailbreak through Windows, users must follow specific steps to get root access on their devices using a streamlined method.
Following are a few steps to jailbreak your iOS device on Windows.
#Step No 1. First, download and install the iTunes app from the Apple official website.

#Step No 2. After installation, back up your iPhone device data using the iTunes app.
Download the Winra1n zip file from the following link:
#Step No 3. https://winra1n.net/download
#Step No 4. Extract the downloaded file and install the UsbDK.msi app.

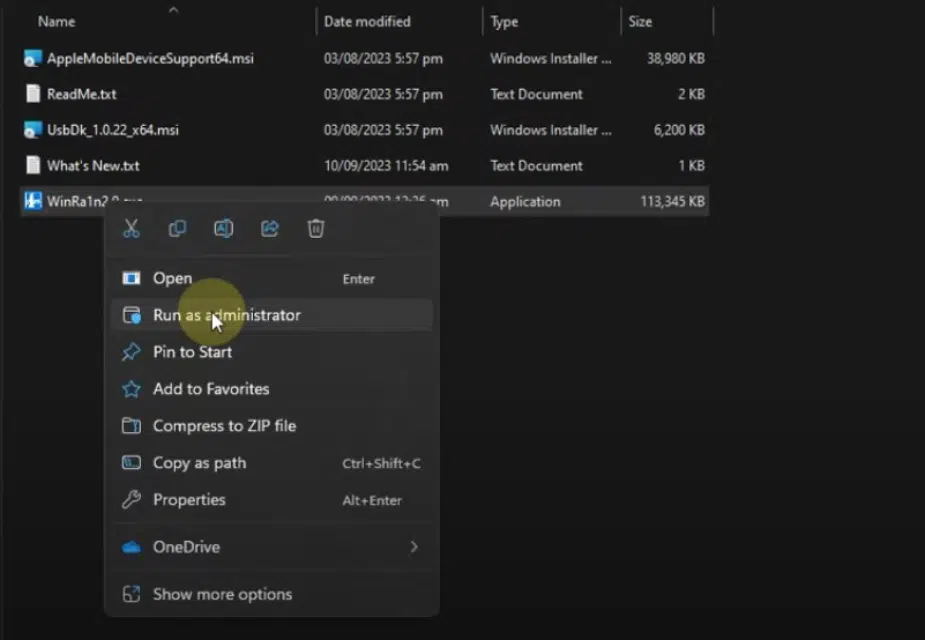
#Step No 5. Now, Right-click on WinRa1n2.1.exe and click on “Run as administrator” WinRa1n app will open.

#Step No 6. Connect your ios device to your computer through a data cable
Note: Please don’t add a passcode in iPhone 8, 8 plus, and X before or after the jailbreak
#Step No 7. Now Select Palera1n from the given option and then select Rootless. Now click on the Next Button. Now, your device will enter recovery mode.


#Step No 8. Entering DFU mode is a straightforward process. Simply tap on the Start button on the new screen and follow the instructions. It’s that simple.
Note: the correct DFU mode keys combination for your iPhone model is as follows: for iPhone X or later, it’s the side button + volume down button, and for iPhone SE, iPhone 8, or below, it’s the home + volume down button.

#Step No 9. Once the phone enters DFU mode, the app will start jailbreaking your device. Wait to complete the process.

#Step No 10. After the process, tap on the Quit button from the app. And your device will reboot.

#Step No 11. After the device reboots. Unlock your device and find the Palera1n app on it.

#Step No 12. Now open the Palera1n app and install “Sileo” Package Manager by tapping on it to install free and paid packages.

Method # 2 Jailbreak iOS 17 with Palera1n on Mac OS
Palera1n is a method for jailbreaking iOS 17, and it is compatible with devices running on iOS 15 to 17. This method improves jailbreaking by introducing new features for iPhone/iPad users. Therefore, follow the given steps to jailbreak your devices with Palera1n through a MacOS device.
How to Jailbreak your iPhone using Palera1n?
Following are a few steps to jailbreak your ios device:
#Step No 1: First, download the palera1n app by visiting the link below:
https://github.com/palera1n/palera1n/releases
Note: Download palera1n-macOS-x86_64 for Mac with an Intel chip and palera1n-macOS-universal for Mac with an M1 or M2 chip.

#Step No 2. After downloading the file, open the “Terminal” app. Now type “chmod +x, “drag and drop the downloaded file to the terminal, and hit Enter.
Note: Please make sure the terminal has full disk access permission.

#Step No 3. Now drag and drop the file to the terminal again, append “-f—c” at the end of the file path, and press enter. It will start waiting for the device.
Note: Please don’t add a passcode in iPhone 8, 8 plus, and X before or after the jailbreak.

#Step No 4. Connect your device to your Mac computer or laptop using a data cable. After being connected, it will move your iPhone to recovery mode.
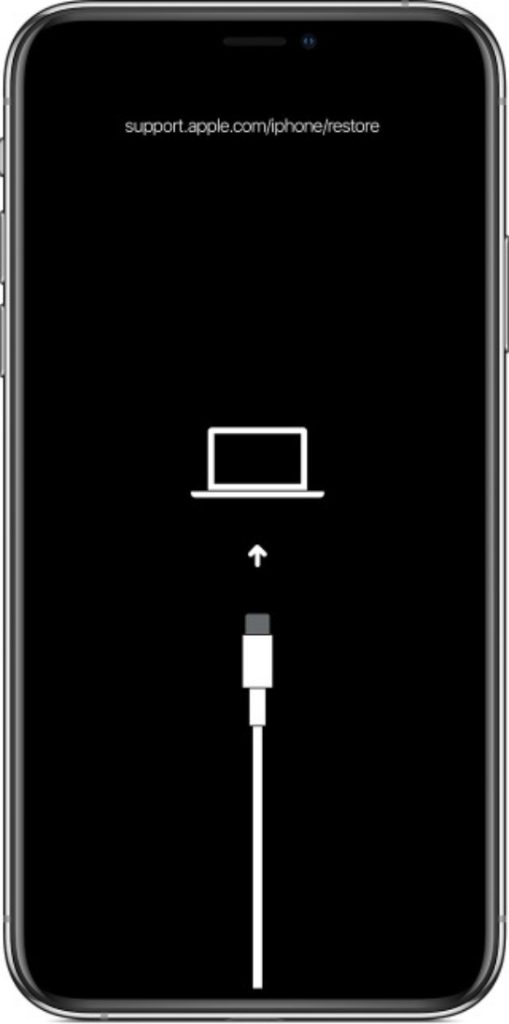
#Step No 5. Press the enter key to initiate the process of entering DFU mode. Then, press the appropriate DFU mode key combination. After a brief moment, release the side button while continuing to hold the volume down button.
Note: DFU mode keys combination for iPhone X or later is side button + volume down button, and for iPhone SE, iPhone 8 or below, these keys are Top button + home button
#Step No 6. Release the volume down button Once your iPhone enters DFU mode. Now, it will start jailbreaking your device


#Step No 7. After the process, your iPhone will be restarted. Once your phone is turned on, find the Palera1n app on it.
Note: If palera1n is not there, please repeat the above process again

#Step No 8. Open the Palera1n app. Install the Sileo Package Manager by tapping on it to install free and paid packages.

Note: The above method in ios 17 will jailbreak your device with rootless type
Method # 3 Jailbreak iOS 17 Using Checkra1n
Checkra1n, a jailbreaking process compatible with iOS 17, offers users the exciting opportunity to remove the restrictions imposed by Apple on their iOS devices.
The convenience of direct download and execution on iOS devices, without the need for Mac or Windows, further motivates users to try the process.
To ensure a successful execution, it’s important to follow the provided guide.
Following are detailed steps you need to follow to jailbreak your iPhone using Chekra1n:
#Step No 1. Open Safari or any browser on your iPhone device, type https://getjailbreaks.com/ on the URL, bar, and hit enter. It will open a webpage.

#Step No 2. Now click on the “Get Jailbreak Now” button and tap “Allow” from the dialog. It will start downloading Profiles.

#Step No 3. Once the profile downloading completes, a dialog will appear titled “Profile downloaded” Click on the “Close” button.

#Step No 4. Now open the Settings app, find “Downloaded Profile,” and tap on it.

#Step No 5. Click on the “CheckRa1n” profile and tap on “Install” from the top right corner.

#Step No 6. Now click on the “Next” button and then on the “Install” button from the top right corner.


#Step No 7. An alert dialog sheet will appear; tap the “Install” option. It will start installing the profile on your device.

#Step No 8. After the installation is completed. Tap on the Done button.

#Step No 9. Now, go to the home screen to find the “CheckRa1n” app. Tap on it.

#Step No 10. It will show a screen. Please tap the “Jailbreak” button to start the jailbreaking process. Once done, you need to do your device verification, and after that, the will install on your iPhone device.

Method # 4 Jailbreak iOS 17 using Unc0ver
Following are detailed steps you need to follow to jailbreak your iPhone using unc0ver:
#Step No 1. Open Safari or any browser on your iPhone device, type https://unc0ver.vip into the URL bar, and hit enter. It will open a webpage.

#Step No 2. Click the “Jailbreak” button and tap “Allow” from the dialog. It will start downloading Profile.

#Step No 3. Once the profile downloading completes, a dialog will appear titled “Profile downloaded” Click on the “Close” button.

#Step No 4. Now open the Settings app, find “Downloaded Profile,” and tap on it.

#Step No 5. Click on the “profile” and tap on “Install” from the top right corner.

#Step No 6. An alert dialog sheet will appear; tap the “” option. It will start installing the profile on your device.

#Step No 7. After the installation is completed, click on the Done button.

#Step No 8. Now go to the home screen, and you will find the “unc0ver” app there. Tap on it.

#Step No 9. It will show a screen. Please tap the “Jailbreak” button to start the jailbreaking process. Once done, you need to do your device verification, and after that, the sileo app will install on your iPhone device.

Method # 5 Jailbreak iOS 17 using Pangu
Following are detailed steps you need to follow to jailbreak your iPhone using Pangu:
#Step No 1. Open Safari or any browser on your iPhone, type https://iospangu.com on the URL bar, and hit enter. It will open a webpage. Tap on the “Download” text and then click on the “Proceed to Download” button.


#Step No 2. Tap on “Allow” from the dialog. It will start downloading Profile.

#Step No 3. Once the profile downloading completes, a dialog will appear titled “Profile downloaded” Click on the “Close” button.

#Step No 4. Now open the Settings app, find “Downloaded Profile,” and tap on it.

#Step No 5. Click on the “Pangu” profile and tap on “Install” from the top right corner.

#Step No 6. An alert dialog sheet will appear; tap the “Install” option. It will start installing the profile on your device.

#Step No 7. After the installation is completed. Tap on the Done button.

#Step No 8. Now go to the home screen, and you will find the “Pangu” app there. Tap on it.

#Step No 9. It will show a screen. Please tap the “Start Jailbreaking” button, and the jailbreaking process will begin. Once done, you need to do your device verification, and after that, the sileo app will install on your iPhone device.


Conclusion
Jailbreaking your iOS device can open up a world of customization and new features but comes with significant risks. If you decide to proceed with any of these methods, remember that you’re not alone. Follow the instructions carefully to avoid bricking your device. Always back up your data before you start the jailbreak process.
Ready to embark on this journey? Choose the jailbreaking method that best suits your needs and unlock the full potential of your iOS device!


